Eating well. To me, this means eating delicious and healthy foods, and regularly feeling nourished and satisfied. Achieving this is possible, but it often means doing the tasks we least want to do, rather than letting ourselves off the hook.
A late-night session with a tub of ice cream is sometimes exactly what we need, but more often than not, what we actually need is the “discipline of self-care.” This means that the default is not to treat ourselves but to take care of ourselves, making true self-care a priority with a focus on long-term goals over short-term gratification.
In terms of food, this means following a balanced self-care plan involving more discipline than indulgence. We must build structures, habits and plans that will improve the overall quality of our lives and help us to prioritize our desire to eat well and feel healthy.
Below are some ideas and some delicious recipes that will make it easier to eat well, every day—or do so as best we can.
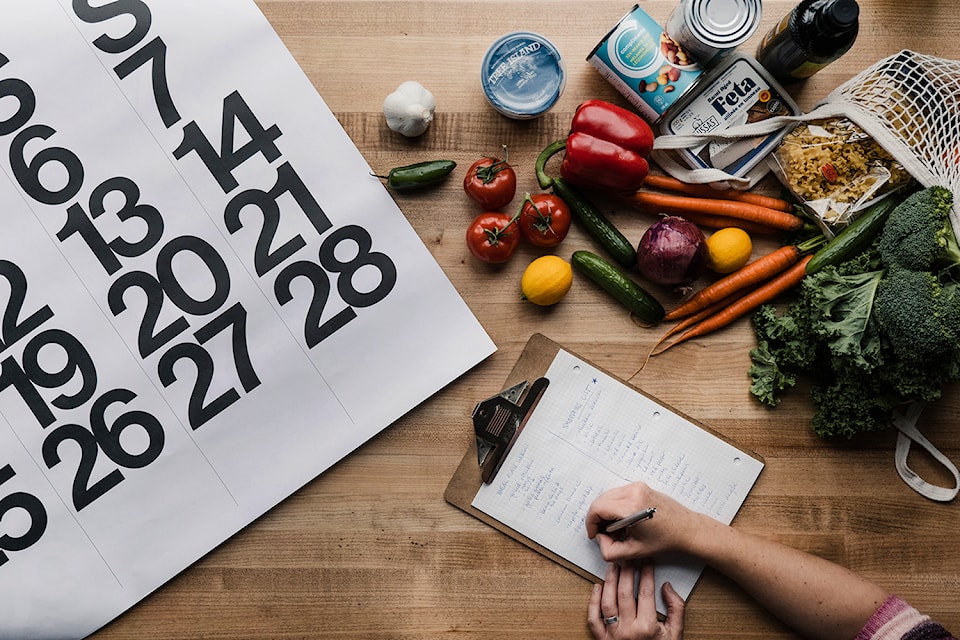
When it comes to healthy eating, and eating well, I use several different strategies, with flexible applications: stocking the pantry; meal planning; meal prepping; and, making nutritious foods more appealing and delicious.
Stocking the pantry generally is the easiest of the four. But making adequate use of our well-stocked pantry is where the discipline of self-care comes in. This is why meal-planning and meal-prepping strategies are the pillars of my eating style.
These are two arms of a similar concept. Planning “what’s for dinner” ahead of time is a game changer! You know what’s for dinner and you have made sure the ingredients are on hand. No need to make a decision when you are tired after work. Meal prepping takes this to the next level: you spent time and energy on the weekend prepping and pre-cooking parts of those planned meals to make weekday life even smoother and easier.
It’s important to start with what is most achievable. Meal prepping is more difficult than meal planning and you may decide that it is not the best use of your time off. Or you may come to meal prep gradually, after months of incorporating meal planning and pantry stocking into your weekly life. Start small; don’t overreach. Include take-out and meal prep kits in the plan, if that is what works best for you. Whatever it takes to feel good about what you are eating.
I use a mix of meal planning and meal prepping for my busy life. I always meal plan, and specifically plan for leftovers, but I don’t always set aside time on a Sunday for actual meal prep. Given our busy schedules, I know to plan for, and shop for, no more than three family dinners per week. And we make sure to cook extra on each of those dinners so that there are always leftovers ready for lunches or dinners on the go.
If I’m making salad for dinner, I double the salad dressing and use half of it to marinate canned beans or lentils for some meal-prep salads. I plan for Monday night’s spiced chicken to be made in a two-kilogram batch, so that I am closer to having healthy lunches or dinners the rest of the week with these delicious “plan-overs.”
This rolls both meal planning and meal prepping into one adaptable workflow. If I have the time to meal prep on Sundays, excellent. If not, I have already incorporated meal prep into my life with big-batch cooking.
Making healthy foods more appealing is icing on the cake. My flavourful and fresh recipes below can be a springboard of inspiration. I love having a meal plan in place and having healthy yummy food ready-to-eat in the fridge. Hopefully, with these ideas and recipes, you can too.
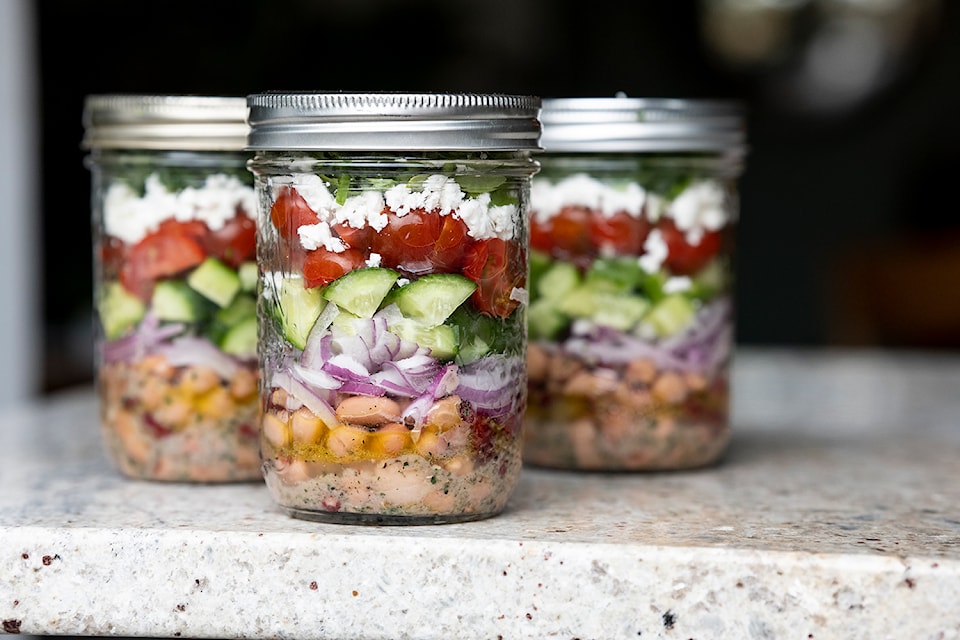
Meal-Prep Marinated Bean Salad with Vegetables
Makes 3 pre-prepped lunches.
This salad is delicious, quick to make, and perfect as a lunch-to-go. The higher acid content of this dressing helps the starchy beans to shine.
Marinated Beans
- 1 can bean medley (mixed beans), approx. 400 ml to 500 ml
- 1 clove garlic, pressed through a garlic press, or minced very fine
- 5 ml (1 tsp) salt
- 45 ml (3 tbsp) white wine vinegar or cider vinegar
- 45 ml (3 tbsp) extra virgin olive oil
- 2.5 ml (½ tsp) freshly ground black pepper
- 2.5 ml (½ tsp) granulated sugar
- 2.5 ml (½ tsp) dried oregano leaves, crushed in your fingers
Salad Prep
- Three 500-ml wide-mouth mason jars, or containers of similar size
- ¼ red onion, thinly sliced or minced
- 90 ml (6 tbsp) crumbled feta cheese
- 750 ml (3 cups) chopped raw vegetables (cherry tomato, cucumber, radish, bell pepper)
- 375 ml (½ cup) shredded spinach leaves or lettuce leaves
- Optional 90 ml (6 tbsp) minced fresh parsley
Marinated Beans: Open the can of beans and pour into a sieve over the sink. Rinse and drain well and place into a mixing bowl. Add the garlic, salt, oil, vinegar, pepper, sugar and oregano. Mix well. Let sit, stirring occasionally.
Salad prep: Divide the marinated beans between three mason jars, along with all of the marinade. Try to get an even amount of marinade into each jar. Top each set of beans with an equal amount of sliced or minced red onion. Top each with 2 tbsp of crumbled feta. Then add 1 cup of chopped mixed vegetables to each jar. Finally, top each with about half a cup of shredded spinach or lettuce. Close the mason jars and place in the fridge.
These last for about four days in the fridge. When you are ready to eat, take out a jar and dump into a bowl, making sure to get every last bit of marinade. Mix well and enjoy!
Big-Batch Braised Leafy Greens with Garlic
Serves 8 as a side, or can be used in other recipes (see below)
An excellent way to get your family members to eat (and enjoy) their greens! My kids love these tender, garlic-infused leafy greens. Leftovers are tasty when tossed with pasta, or stirred into cooked beans or an omelet, or used in a sandwich.
Ingredients
- 900 g (2 lbs) mixed fresh leafy greens (kale, chard, gai lan, collards, beet tops, broccoli, rapini, bok choy, braising mix, or any other green that you find)
- 60 ml (4 tbsp) butter, olive oil or other cooking oil of choice
- 12 cloves garlic, peeled and chopped
- 2.5 ml (½ tsp) dried chili flakes, more to taste
- 4 ml (¾ tsp) salt, or to taste
- 45 ml (3 tbsp) water
Wash greens well in a sink full of cool water and place in a colander to drain. Use your fingers or a sharp knife to separate the soft leaves from the stems. Discard the stems of the kale or beet tops, but the other stems can be cooked. Slice the usable stems into ½-inch slices and cut or tear the leaves into large pieces (about 1- to 2-inch squares). Broccoli stems need to be peeled before slicing. Keep the stems and leaves separate.
Place the butter or oil, garlic and chili flakes together in a large skillet or sauté pan. Place on a burner and heat over medium heat. Stir continuously as the garlic cooks, sautéing until the garlic is very pale golden and sticking together in small clumps (or sticking to the spoon). This will take about one minute. Turn the heat down, if you need to, to prevent the garlic from burning.
When the garlic is done, immediately add the water and the stems from the greens, stirring to coat with the garlic mixture. Sauté for one minute, then add the leaves from the greens. You may need to add these in batches. Sprinkle in the salt, turn down the heat, cover the pot and let the greens cook 3 to 7 minutes more, stirring occasionally, until the greens are tender and infused with garlic. If necessary, add another tablespoon of water to the pan while the greens are cooking to prevent burning—but the greens should be fresh enough to cook in their own juices. Cooking time will vary depending on the type of green vegetable you chose.
Serve the greens immediately as a side dish or allow to cool before storing for use in soups or pastas.
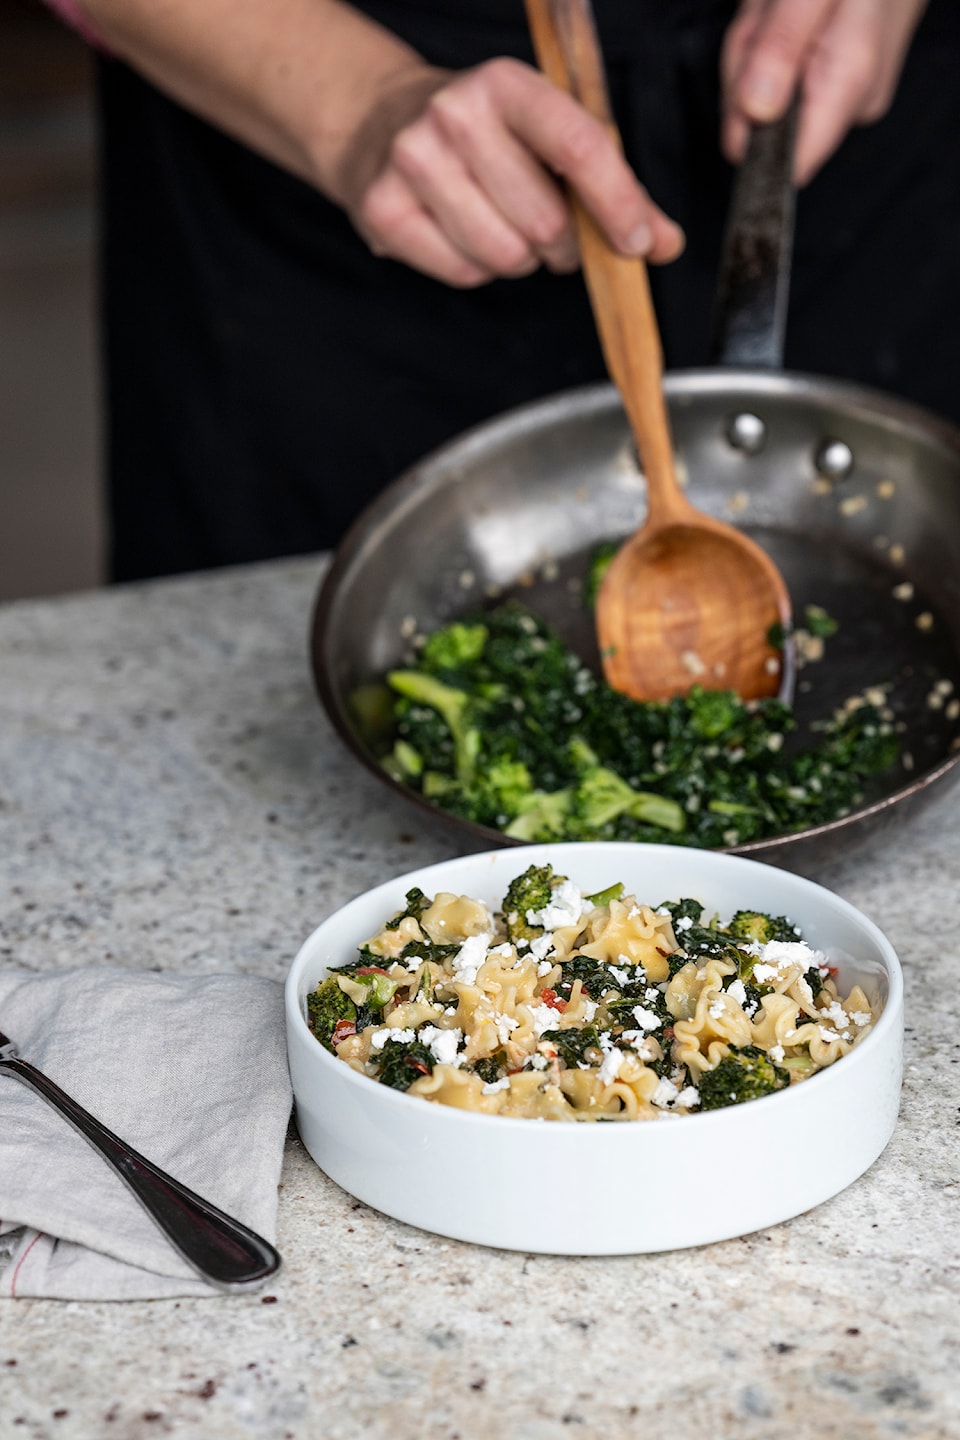
Quick Pasta with Garlic Greens
Serves 4
A quick and simple recipe that turns an abundance of greens into a lip-smacking meal.
- 250 g (½ lb) dry pasta shapes, such as penne or rotini (gluten-free pasta if needed)
- Half batch of garlic greens (see separate recipe)
- 2 to 3 ripe tomatoes, chopped
- 1 ml (¼ tsp) salt
- 125 ml to 250 ml (½ cup to 1 cup) crumbled feta cheese or other cheese of choice
- Optional one can solid white tuna, drained and broken into pieces
- Optional 60 ml (¼ cup) minced fresh parsley
- 15 ml (1 tbsp) olive oil, for finishing
Bring 2 to 3 litres of water to a rolling boil in a large pot. Add 1 teaspoon of salt and the pasta. Stir frequently in the first few minutes to keep pasta pieces separate. Cook 8 to 10 minutes, until done to your liking.
Meanwhile, heat the half batch of garlic greens in a large saucepan along with the tomatoes and salt. Heat this gently over medium heat or medium-low heat. Greens should become warm and fragrant; tomatoes should just start breaking down.
When pasta is cooked, drain, reserving one cup of the cooking water. Add drained pasta to the pan with the greens and tomatoes. Add the parsley, if using, and a few tablespoons of the reserved pasta water. Stir to combine, then simmer together to meld flavours, about 1 minute. Add more pasta water if the dish seems too dry. Stir in the cheese to heat through, drizzle with the olive oil and serve.
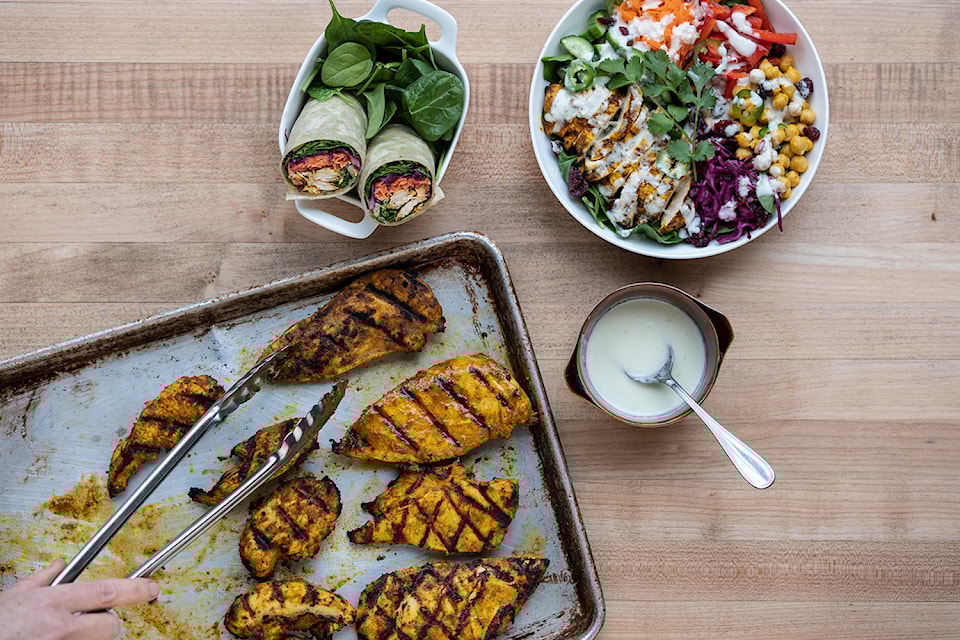
Big-Batch Indian-Spiced Grilled Chicken
Serves 8 to 10
This tender, flavourful chicken works as a main dish protein, as well as for use in other planned meals. My favourite ways to use this spiced chicken as “plan-overs” are in a gingery salad and in a wrap.
Marinade
- 125 ml (½ cup) vegetable oil
- 82 ml (1⁄3 cup) lemon juice
- 7.5 ml (1½ tsp) salt
- 5 ml (1 tsp) sugar
- 2 cloves garlic, grated or finely minced
- 10 ml (2 tsp) grated or minced fresh ginger
- 15 ml (1 tbsp) garam masala
- 15 ml (1 tbsp) ground turmeric
- 10 ml (2 tsp) paprika
- 10 ml (2 tsp) ground cumin
- 2.5 to 10 ml (½ tsp to 2 tsp) cayenne (depending on your desired spice level)
Chicken
- 1,300 g (3 lb) boneless skinless chicken breasts
Marinade: Combine marinade ingredients in a large bowl and mix well. (If desired, scoop two tablespoons of this marinade into a mason jar for marinating chickpeas for a salad later in the week.)
Prepare chicken: If the chicken tender is present, remove this and place in the bowl with the marinade. With the remaining breast, slice the thick part of the breast in half (like a bagel) to make thinner cutlets. Cut the large piece in two. You will end up with three pieces of chicken breast that are approximately the same size and thickness. Place these in the bowl with the marinade. Proceed with the remaining chicken. The thinner cutlets will absorb the marinade more quickly, cook more quickly and spread out over more meals.
Mix the chicken well so it is evenly coated with marinade. Marinate for at least 30 minutes and up to 2 hours. Don’t marinate for any longer because the high acid content can affect the texture of the chicken.
When ready to cook, drain chicken well and discard the marinade. You can bake this chicken in an air fryer set to 400 F, or grill it on a preheated grill for 3 to 4 minutes per side. Internal temperature of the chicken should register 165 F (74 C) on an instant reading thermometer when properly cooked.
Serve the first night with rice and veggies. Use leftovers as desired (salads, sandwiches, wraps, soups). Use the following recipes as a guide.
Indian-Spiced Chicken Wrap
Serves 4
For a quick dinner or lunch-to-go, this recipe makes use of both the grilled chicken and the ginger dressing from the two previous recipes, for a great meal planning option.
Four 10- to 12-inch flour tortillas
- Leftover Indian-spiced grilled chicken, chopped
- 1 to 1.5 litres (4 to 6 cups) assorted chopped or shredded vegetables (carrots, bell pepper, cabbage, spinach, cucumber)
- 60 to 90 ml (4 to 6 tbsp) ginger-yogurt dressing (previous recipe)
- Thinly sliced jalapenos, if desired, OR pickled jalapenos
- Chopped cilantro leaves, if desired
- Salt, if desired
Heat the tortillas in a dry frying pan until pliable. Place 1 to 1.5 cups of shredded vegetables down the centre of each tortilla. Sprinkle with salt, if desired. Drizzle with ginger-yogurt dressing. Add chopped spiced chicken, sliced or pickled jalapenos (if desired) and chopped cilantro (if desired).
Roll tortillas tightly. Slice in half before eating.
Spiced-Chicken Salad with Ginger-Yogurt Dressing
Serves 4
This zesty creamy dressing can be used as a marinade for the chickpeas, as a salad dressing or as a sauce in a wrap. This salad can also be prepped in four mason jars, with the chickpeas, chicken and dressing on the bottom, and the veggies on top, for a planned lunch-to-go.
Ginger-Yogurt Dressing
- 250 ml (1 cup) plain yogurt
- 125 ml (½ cup) freshly squeezed lemon juice
- 30 ml (2 tbsp) finely grated or minced ginger
- 60 ml (¼ cup) vegetable oil
- 7.5 ml (1½ tsp) salt
- 10 ml (2 tsp) sugar or honey
- 10 ml (2 tsp) finely minced jalapeno or ¼ tsp cayenne
Salad
- One 400- to 500-ml can of chickpeas, drained and rinsed
- 30 ml (2 tbsp) reserved marinade (see chicken recipe above)
- 4 to 8 pieces of leftover Indian-spiced grilled chicken
- 2 litres (8 cups) spinach leaves or mixed lettuce leaves
- 1 litre (4 cups) chopped raw vegetables (good options include grated carrot, shredded cabbage, chopped cucumber, sliced tomato, sliced green onion, sliced bell pepper)
- Optional 60 ml (¼ cup) sultana raisins or dried cranberries
- Cilantro leaves for garnish, if desired
Dressing: Combine all ingredients and whisk until smooth. Taste to adjust seasonings. Some yogurts are tarter than others, so you may need to adjust the acidity or sweetness with more lemon juice or sugar.
Chickpeas: If possible, the day before, rinse and drain the chickpeas and place in a mason jar with the reserved marinade (the 2 tablespoons you reserved BEFORE adding the chicken, see chicken recipe above). Close the lid and shake well. Place in the fridge and shake several times over the day until you are ready to use it. When close to serving time, add 2 to 3 tablespoons of the ginger-yogurt dressing to the chickpeas and shake well again.
Salad: Using 4 large soup bowls, divide the spinach or lettuce between the bowls. Divide the marinated chickpeas between the four bowls. Divide the prepped vegetables between the four bowls. Drizzle each bowl with some of the dressing. Slice up the chicken and divide it among the bowls. Scatter the raisins or dried cranberries over the top of each, if desired. Drizzle on some more of the dressing. Garnish with cilantro and serve.
Alternatively, layer this salad into 4 mason jars, with the chickpeas, chicken and dressing on the bottom, and the veggies on top, for planned lunches-to-go.

