I am a chef and I love to cook—yes, even at home, even as a hobby.
Most chefs get into their careers because of an abiding passion for food and cooking. The passion doesn’t always die with a career in hospitality; rather, it can evolve into a two-stage system, with a distinct separation between professional and personal cooking lives.
At home, I often cook very simply, but still with love. As with most chefs, I have a need to create a home kitchen space that still gives me joy in cooking, without reminding me too much of my job.
In my professional life, I’m known as a chef with extensive knowledge of international cuisines and ingredients. My cooking classes cover everything from Thai and Indian to Moroccan and Mexican, and an entire season of my TV show was themed “travel by plate.” It’s natural to assume that I cook like this at home all the time. But a lot has changed over 30 years.
I got into teaching international cuisines out of a love for and an interest in those cuisines. When I first moved out on my own, my home cooking style matched exactly what would eventually become my professional cooking style. I cooked almost exclusively with an international palate of spices, aromatics and cooking techniques. The joy was in the learning! In my early years, the combination of my interest in flavours from around the world—and the time to explore them—meant that they became an important part of my cooking style.
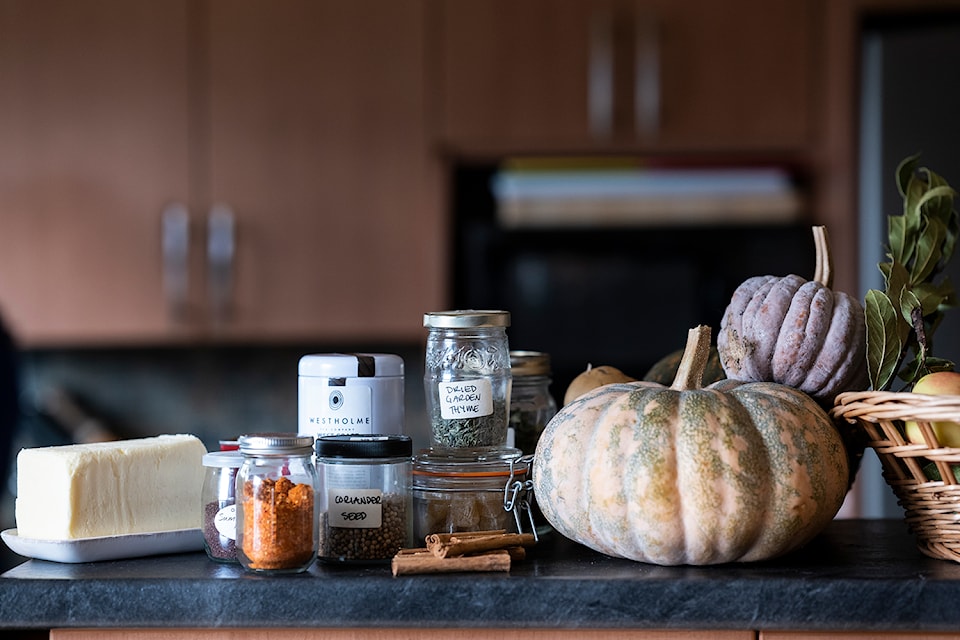
This slowly began to evolve as my life changed, and I started a family and a business. Home-cooked meals became simpler and blander out of necessity. A focus on the health and future of my children led me to explore more seriously the seasonal foods in our region, and dive into butchery and food preservation. Outside of work, I began to spend more time at farm markets and less time at specialty grocery stores.
But the core of my cooking style has never changed. This core lives in my desire to create meaning and joy in my kitchen. Whether this comes from a new learning project, a delicious family meal, a collection of curated kitchen tools, or vegetables lovingly gifted from my mother’s garden, it is connected to what is joyful, meaningful and achievable for me on a day-to-day basis.
I may not always have the time or energy to create impressive meals at home, but I usually cook from the heart. My home-cooking style now could best be described as “local seasonal ingredients prepared with simplicity” rather than “food with international flair.” Not that those two are mutually exclusive, by any means! Vancouver Island doesn’t have the climate and growing conditions for a lot of the spices and aromatics used in other parts of the world, but that doesn’t stop me from using them as inspiration. I often combine the two at home with joy (Indian spices with local turnips, for example, are so good), but just as often do not.
I’m around flavourful international food all the time at my job—I get my fix of delicious Indian curries, spicy Thai noodles and umami-rich Chinese stir-fries, many times per week at work. At home, I want to rest in foods that are distinctly different, as a break from work. So, the main focus of my personal cooking life has shifted a bit to compensate and create a distinct boundary.
What is meaningful to me changes as I age, what is new to me shifts as I grow, what brings me joy in the kitchen is ever-evolving. But finding that joy is in the core of all that I do as a cook. At one time this was fed by exploring international flavours, now it is fueled by discovering new ways to learn and grow.
Cooking has always been my main hobby, so turning it into a career means that I need to find ways to capture the “hobby feeling” in the kitchen again. I can most easily recapture this feeling by tackling a learning project.
It’s become increasingly important to me to feel like a beginner again in the kitchen—the rush of learning and exploring is what has always made cooking fun. Lately, it’s been gardening and bread-making, specifically sourdough bread in all its forms. I may not be thrilled to make family dinner after cooking all day for work, but I am still excited to try my hand at sourdough English muffins!
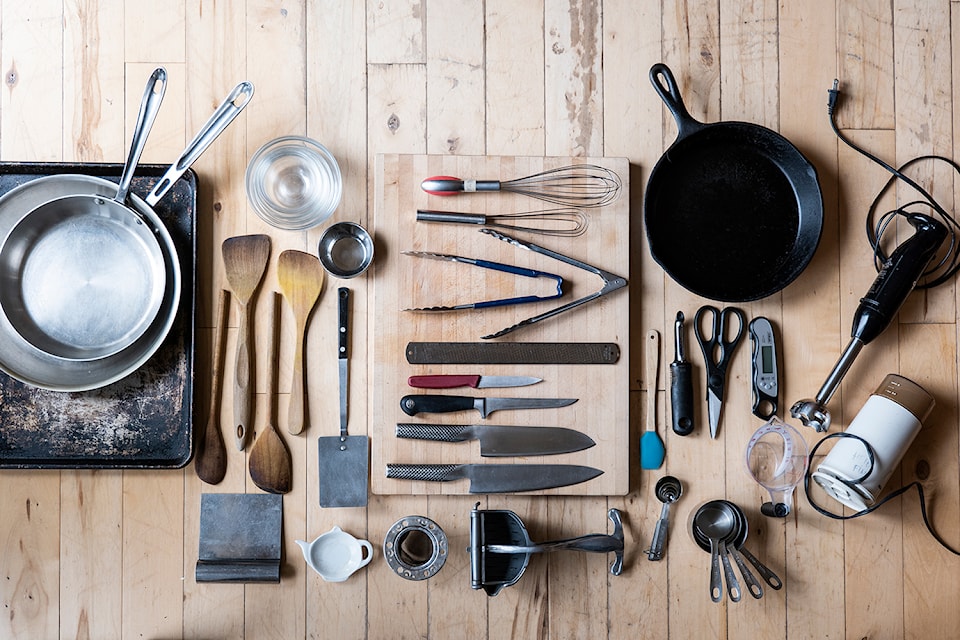
Finally, I can’t talk about my personal home-cooking style without talking about my must-have kitchen tools. My tools bring me joy and ease; they are an extension of me and of my work.
Obviously, at home I don’t have large industrial-size equipment that I would use in a professional space, but many of my must-haves are things I discovered working in professional kitchens—tools like kitchen scales, timers, instant reading digital thermometers, specialty knives and mandolines. But I love to mix those with unique items that I’ve collected and loved, like my antique aluminum citrus juicer, my angled wooden spoons, my vintage glass jars inherited from my grandmother, my cast iron pan inherited from my grandfather, and my collection of tea-making paraphernalia.
My personal cooking style is, at heart, about the joy and the learning. It is a blend of what is meaningful to me, the tools and ingredients that bring me joy, the learning focus that ignites my passion and the ability to feed my family in a way that feels different from my job. I cook simply and with love.
Heidi’s must-have kitchen tools
- High-quality stainless-steel skillets
- Well-seasoned cast iron pans
- Heavy gauge aluminum sheet pans
- Wooden cutting boards
- Assorted chef knives, boning knives, paring knives
- Instant-reading digital thermometer
- Spice grinder
- Immersion blender
- Kitchen scale
- Japanese mandoline
- Angled wooden spoons
- Flat whisk
- French whisk
- Vintage thin-metal spatula
- Antique citrus juicer
- High-quality tongs
- Assorted ramekins and pinch bowls
- Kitchen shears
- High-quality peeler
- Angled-view liquid measuring cup
- Bench scraper
- Mini tools, such as mini-spatula and mini-whisk
- Silicone spatula
- Measuring spoons and cups
- Tea strainer and cute tea bag holder
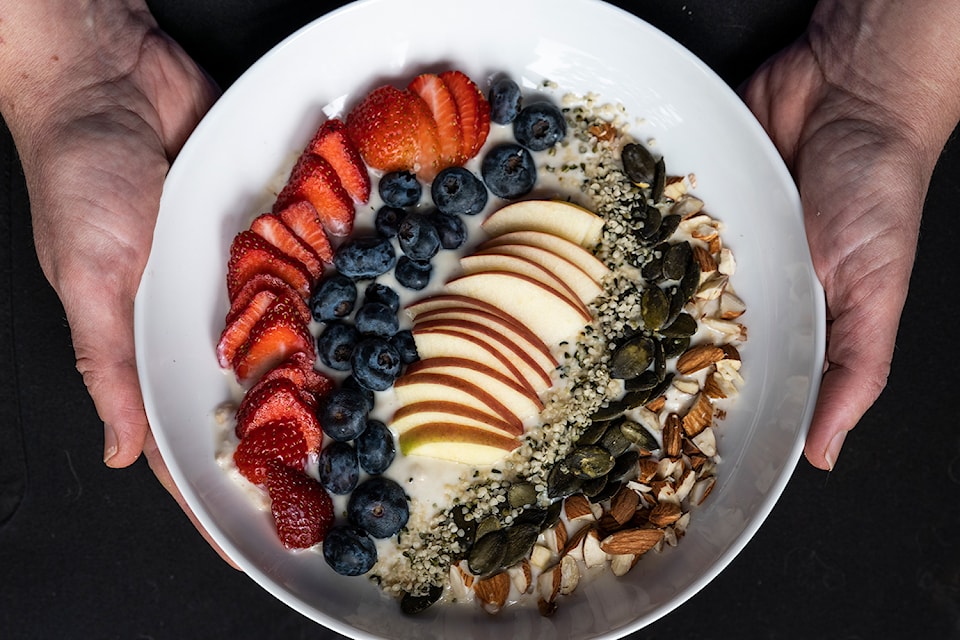
Heidi’s Daily Breakfast Bowl
This dish, more than any other, defines my personal food style. I have been eating some variation of this unsweetened bowl of fruit, yogurt, nuts and oats almost daily since I was in my early teens. Both granola and cooked oatmeal have been included over the decades, but for the last 10 years it has been based on a bowl of muesli, otherwise known as “overnight oats.”
Note: There are two secrets to success with this breakfast: first, using old-fashioned rolled oats instead of quick oats, as the resulting texture is never gummy; second, using plain unsweetened, unflavoured yogurt and protein powder—the fruit makes it sweet enough for every day.
Ingredients
- ¼ cup old-fashioned rolled oats
- ½ to ¾ cup plain whole milk yogurt (Use flavoured yogurt if you prefer.)
Optional:
- ½ scoop plain unflavoured whey protein powder (I prefer how the plain whey blends into the background with no distinct taste or sweetness, but feel free to use vanilla-flavoured or a vegan protein base or leave it out altogether.)
- 1 cup sliced seasonal fruit (Apples and frozen blueberries feature most of the year, but in the summer and early fall, I rely more on berries, stone fruits and grapes.)
- 1 to 3 tbsp assorted nuts and seeds, chopped if necessary (My consistent three favourites are raw almonds, raw hemp seeds and raw pumpkin seeds.)
- 2 tsp ground flax or chia seeds
Method:
The night before: Mix together the old-fashioned rolled oats and plain yogurt in a food-safe container with a lid. Let soak overnight at room temperature.
The next morning: Mix in the protein powder, if using, until completely dissolved. Stir in the chopped fruit and the nuts and/or seeds. Mix well. Sprinkle the top with ground flax seeds or ground chia seeds.
Enjoy!
Heidi’s Basic Vinaigrette
With a 1:2 ratio of acid to oil, this vinaigrette is bright and refreshing. It’s my favourite way to liven up some spring greens. I would put this on every salad, if I could.
Ingredients
- 30 ml (2 tbsp) fresh lemon juice
- 30 ml (2 tbsp) cider vinegar or white wine vinegar
- 10 ml (2 tsp) Dijon mustard
- 15 ml (1 tbsp) honey OR 2 tsp sugar
- 2.5 ml (½ tsp) fine salt
- 2.5 ml (½ tsp) freshly ground black pepper
- 1 small clove garlic, pressed or grated
- 125 ml (½ cup) mild fruity extra virgin olive oil, or mild oil of your choice
Method
In a small mason jar, mix together the lemon juice, vinegar, Dijon, honey or sugar, salt, pepper and garlic. Put the lid on and shake until the mustard and honey have dissolved. Sometimes it helps to shake, let it sit for a few minutes, and shake again.
Remove the lid, pour in the oil, close the lid tightly and shake again until the dressing is emulsified.
Serve over any salad, but I especially love this bracing vinaigrette with a mix of early spring lettuces and bitter greens (such as chicory and radicchio), and garnished with sliced radish, shaved fennel, baby cucumber and cherry tomatoes.
Roasted Asparagus
The simplicity of this preparation really brings out the best in my favourite springtime vegetable. I could eat this whole pound by myself!
Ingredients
- 454 g (1 lb) asparagus
- 22 ml (1½ tbsp) ghee or butter
- 1 ml (¼ tsp) salt
- 1 ml (¼ tsp) freshly ground pepper
- Optional: Juice of ½ lemon
Method
Preheat oven to 400 F. Cover a baking sheet with parchment paper.
Snap off the tough ends of each stalk of asparagus. Discard the tough ends and place the trimmed asparagus spears in a large bowl. Melt the ghee or butter, either in a small pot on the stove, or in a microwave-safe dish in the microwave. Sprinkle the asparagus with salt and pepper, drizzle with the melted ghee or butter, and toss well to combine.
Spread asparagus on the parchment-lined tray and place in the oven. Roast for 7 to 10 minutes, until crisp-tender. Transfer asparagus to a serving platter and sprinkle with the fresh juice from ½ lemon, if desired. Serve immediately.
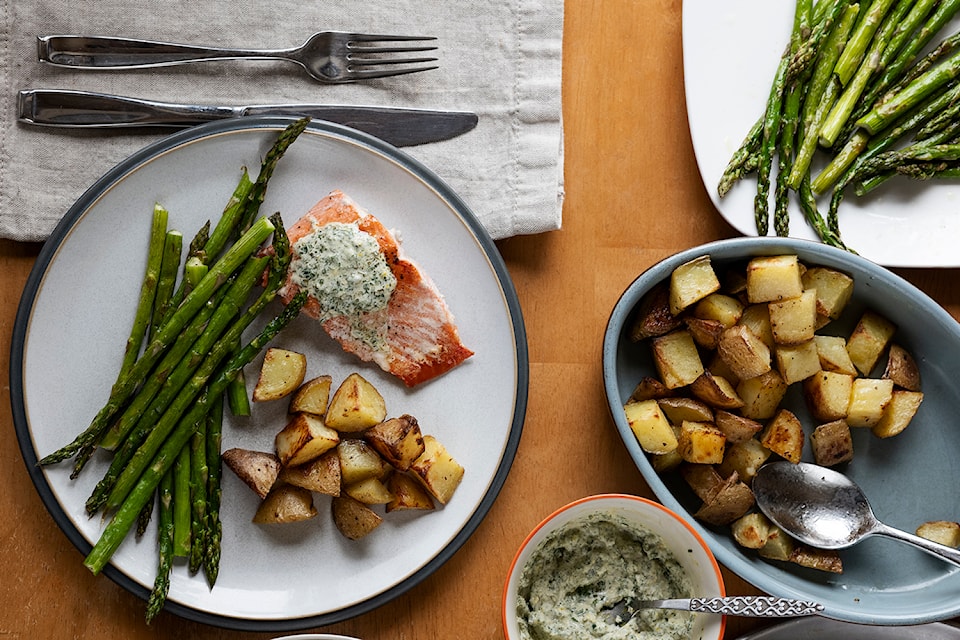
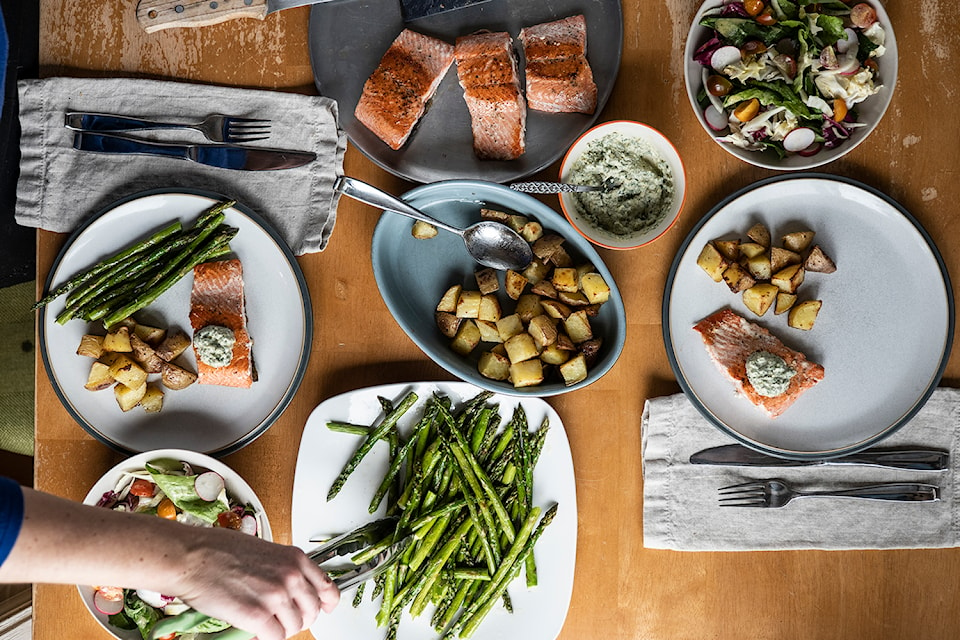
Simple Pan-Seared Salmon with Family Sauce
Cooked right, fish in season needs no seasoning other than salt; still, a small dollop of a Fink family favourite sauce (recipe above) adds some polish to a light and refreshing meal.
Fillets
- 4 wild salmon fillets, approximately 150 to 200 g each
- 4 tbsp clarified butter or oil
- Salt
Sauce
Use salmon sauce above or flavoured butter of your choice
Method
Heat two large skillets (cast iron is a great choice) over medium to medium-high heat. While the skillets are heating, sprinkle the fillets generously with salt. When the skillets are hot, add half the butter or oil to each pan, place fillets skin-side down in the pans and cook without moving for about three minutes. Use a thin metal spatula to loosen the fish and flip it over. Cook for about two minutes more. Serve immediately, with flavoured butter and spring vegetables.
IMPORTANT: The pan should be hot but not smoking for this. You should end up with a golden-brown crust on the top, not a black one. The fish will be just barely cooked in the middle, to maintain moisture. Adjust heat and timing depending on how easily your stove heats up and how thick the fish is.
My Family’s Favourite Salmon Sauce
This is a variation on a salmon marinade that my parents used to make. I loved the flavours, but I wanted them in a compound butter rather than a marinade, so that I could taste the salmon itself. I’ve tweaked this recipe over 25 years. It is my kids’ favourite. It tastes delicious on other types of fish as well.
Ingredients
- 45 ml (3 tbsp) minced fresh chives
- 22 ml (1½ tbsp) butter
- 60 ml (4 tbsp) minced fresh parsley or dill
- Finely grated zest of ½ lemon
- 1 very small clove garlic, pressed
- 15 ml (1 tbsp) fresh lemon juice
- 2.5 ml (½ tsp) soy sauce
- 22 ml (1½ tbsp) Hellmann’s mayonnaise
Method
Place chives and butter in a small pot on the stove and turn heat to low. Once the butter has melted and the chives smell fragrant, remove from heat and scrape mixture into a small bowl. Add the parsley, lemon zest and garlic, mixing well.
Allow to cool completely, then mix in the lemon juice, soy sauce and mayonnaise. Taste and adjust salt and lemon, if necessary. Keep in the refrigerator until ready to use.
As soon as the salmon (or other fish) is done, serve immediately, with a dollop of this sauce on each piece. The sauce will melt into the salmon. Delicious!


